

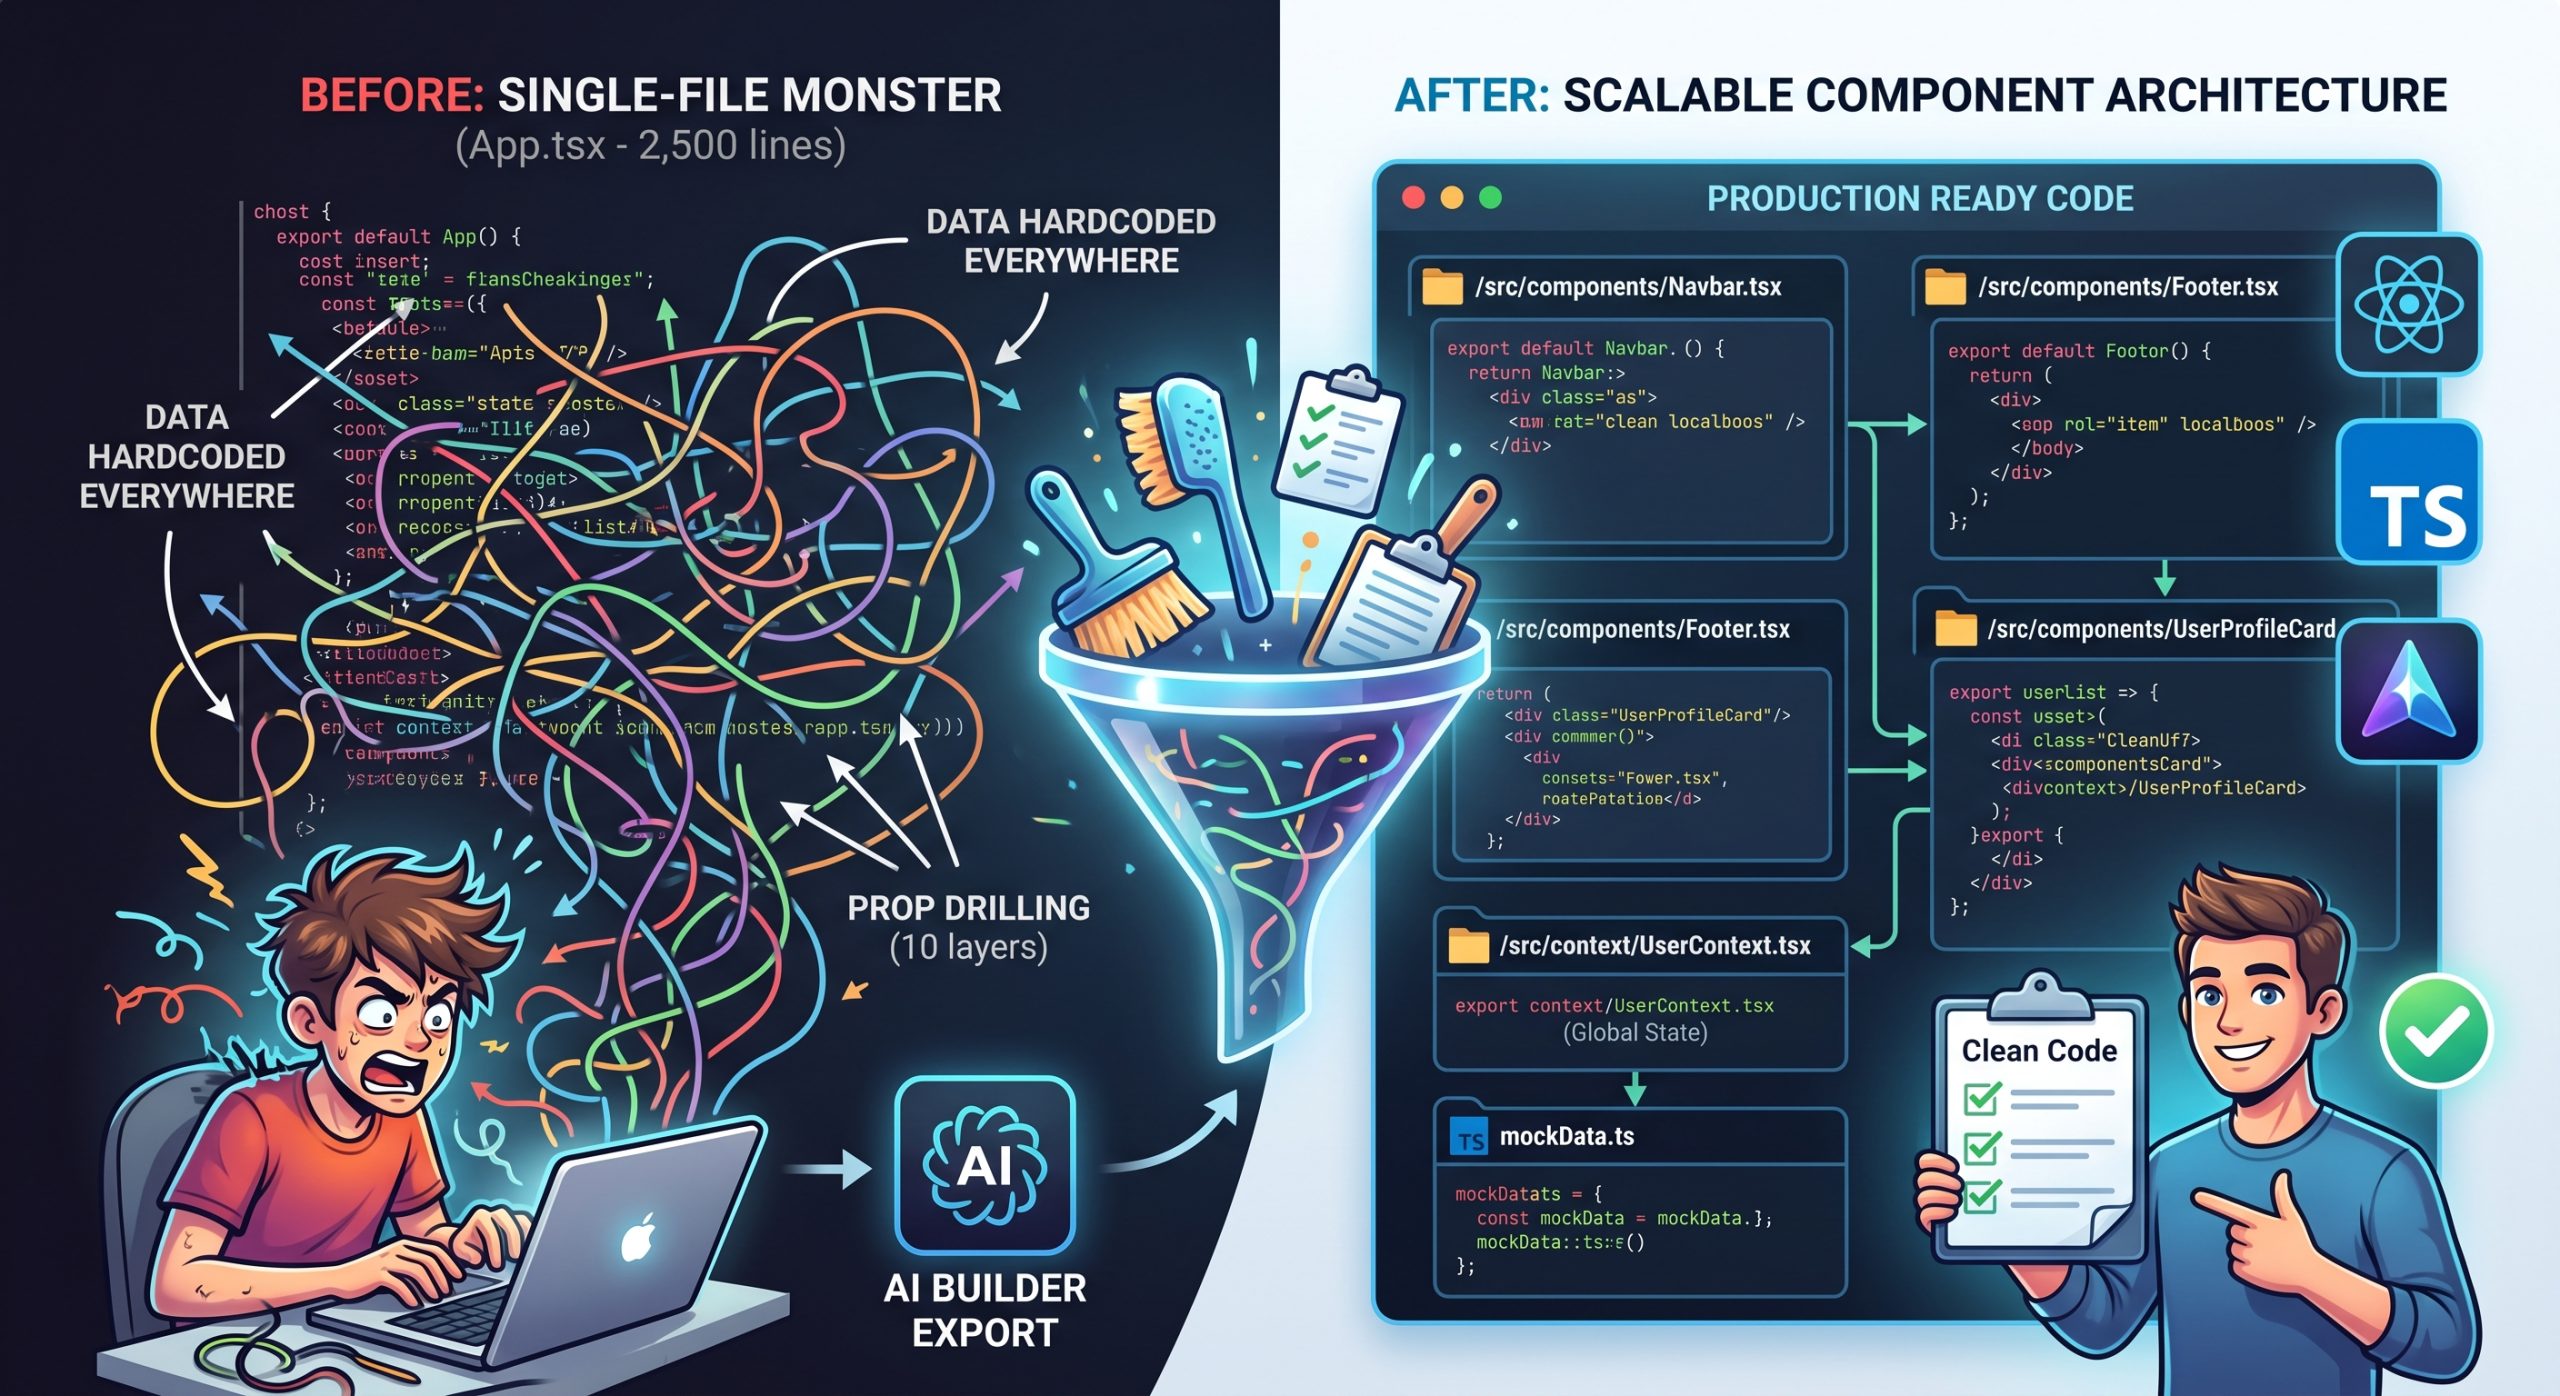
So, you just exported your brand-new web app from an AI builder.
You unzip the file. You open it up in your local editor.
And you are absolutely horrified.
The application looks beautiful on the screen. But under the hood? The codebase is a total disaster.
Everything is crammed into one giant file. Data is hardcoded everywhere. And props are being drilled down through ten different component layers.
I’ll be honest with you.
AI writes code like a junior developer who just drank three Red Bulls. It is incredibly fast. It is super eager. But it has absolutely zero long-term architectural vision.
If you try to build a real backend on top of this messy foundation, the entire house is going to collapse.
Refactoring isn’t just a good idea. It is mandatory.
In this guide, I am going to show you exactly how to clean, audit, and refactor AI-generated React code so it is ready for production.
Let’s dive right in.
The “Spaghetti Code” Reality of AI Builders
Before we fix the code, we need to understand why it is broken in the first place.
Here is the deal:
Cloud-based AI builders (like Bolt.new, v0, or Lovable) are optimized for one thing and one thing only: Visual Speed.
When you type a prompt, the AI knows that you want to see a beautiful UI on your screen in less than 10 seconds.
To achieve that speed, the AI takes massive technical shortcuts.
It doesn’t have the time (or the context window) to carefully plan out a scalable folder structure. It doesn’t pause to think about how your state management will perform three months from now.
Instead, it just starts throwing code at the wall until the preview window looks correct.
The result? Spaghetti code.
I’ve seen exported React projects where the App.tsx file is 2,500 lines long. It contains the routing logic, the navigation bar styling, the user dashboard UI, and the API fetch requests—all shoved into a single, unreadable file.
If you try to add a new feature to a file like that, it will break.
You have to tame the spaghetti.
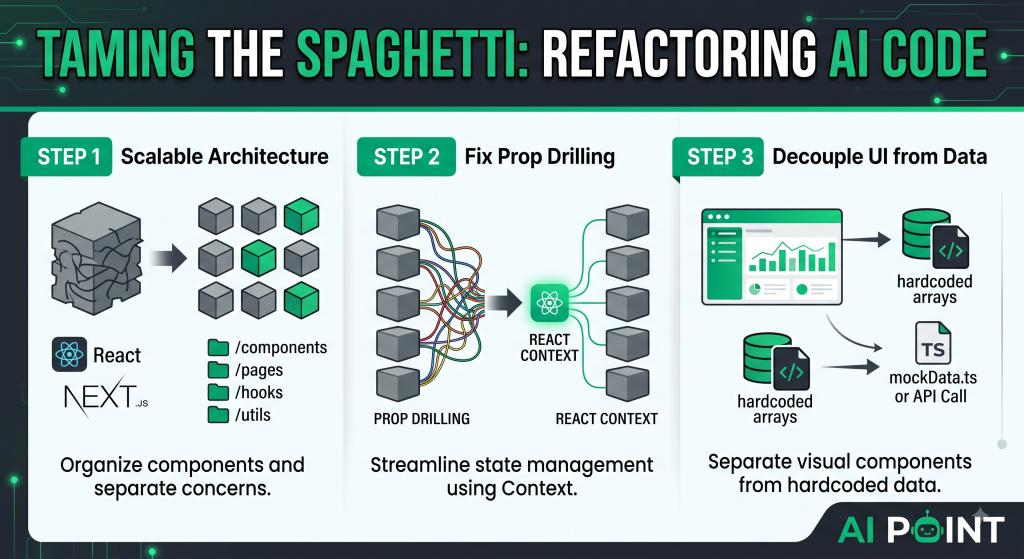
And to do that, you need to follow a strict 3-step refactoring process.
Step 1: Establishing a Scalable Component Architecture
The very first thing you must do is chop up that single-file monster into small, bite-sized components.
In modern web development, modularity is everything.
If your navigation bar and your footer are in the same file as your main dashboard, you are doing it wrong.
Here is exactly how to fix it after moving your codebase to a local AI IDE like Cursor.
First, create a standard directory structure. In a Next.js or React project, you need a dedicated /components folder.
Next, highlight a distinct section of your massive App.tsx file. Let’s say, the navigation bar.
Instead of cutting and pasting it manually (and risking a massive import error), use your local AI IDE to do the heavy lifting.
Open Cursor’s Composer (Cmd+I) and use this exact prompt:
“Extract this navigation UI into a separate, isolated component called Navbar.tsx. Place it in the /components directory. Then, automatically update the imports in App.tsx so the app continues to run without errors.”
Boom.
In three seconds, Cursor will slice the code perfectly.
Rinse and repeat this process for every major section of your UI.
Extract the Footer.tsx. Extract the Sidebar.tsx. Extract the UserProfileCard.tsx.
Why is this so important?
Because AI models perform significantly better when they have a narrow, focused task.
If you ask an AI to “add a button to the marketplace,” it will get confused by the massive file and break things. But if you ask the AI to “add a button to ProductCard.tsx,” it will succeed 100% of the time.
Force modularity early, and your future self will thank you.
Step 2: State Management and Prop Drilling Fixes
Now that your files are organized, we need to fix the data flow.
Because AI builders lack a global view of your application’s architecture, they rely heavily on something called “prop drilling.”
What is prop drilling?
It is when you pass data (like a User’s name or profile picture) down through five, six, or seven layers of components just to get it to show up on the screen.
For example: App -> Dashboard -> Sidebar -> UserSettings -> ProfilePicture
This is a nightmare to maintain.
If you want to change how the user profile works, you have to update the code in five different files.
We need to rip this out and replace it with a global state solution.
Depending on the size of your app, you should use React Context or a lightweight library like Zustand.
Here is how to automate the fix with Cursor.
Highlight the top-level component where the messy state originates, and write this prompt:
“This component is heavily prop-drilling the ‘User’ object down to child components. Refactor this entirely. Create a new React Context called UserContext.tsx. Wrap the application in a UserProvider, and update all child components to consume the User object directly using the useContext hook.”
The AI will scan your new, modular files, remove all the messy props, and wire up a clean global state.
Suddenly, your codebase isn’t just organized—it is actually scalable.
Step 3: Decoupling UI from Data
We are almost at the finish line.
Your builder prototype probably looks incredible. But it is likely an illusion.
To make the UI look populated, the AI builder hardcoded a bunch of fake arrays directly into your frontend components.
You will see things like: const recentTransactions = [ { id: 1, amount: $50 }, { id: 2, amount: $100 } ];
Before you build a real backend, you must decouple the visual UI from this fake data.
If you leave hardcoded data inside your components, wiring up a real database later will be a massive headache.
Here is the fix.
Search your codebase for all hardcoded arrays and objects.
Move them out of your component files and into a dedicated mockData.ts file.
Then, highlight your component and prompt your IDE:
“I have moved the fake data to mockData.ts. Now, rewrite this component to fetch the data asynchronously using a useEffect hook. Treat the mock data like a real API response, including loading states and error handling.”
By forcing the component to “wait” for the data as if it were a real API call, you are preparing your frontend for the real world.
When you finally connect your Next.js API routes or your Postgres database, you simply swap the mock import for a real fetch request.
Conclusion
Exporting code from an AI builder is just step one.
If you want to survive in production, you have to do the dirty work.
You have to tear down the single-file monsters, establish a strict component architecture, fix the prop drilling, and decouple your fake data.
A clean codebase is the foundation of every successful AI-assisted application. Build on a rotten foundation, and you will stay stuck in the prototype phase forever.
Don’t add a single new feature today.
Instead, open your exported project, run an audit, and start refactoring. Your production-ready app is waiting.
